MetaData Preferences – Introduction
Concept
This functionality provides a general tool for editing metadata via the WebOpac. It can for instance be used to allow users to enter and update data in the Community Information system.
The data is accessible through a webform after previous user logon.
Entered data will initially be stored in a temporary global. Then after validation by an authorized staff member the data are loaded as bibliographical records into the main database, using standard loader procedures.
Licence information
Note that the MetaData Edit feature is not a standard part of the Vubis application. It requires a specific license and must be installed and activated separately. Please contact your account manager for pricing and installation information.
2. Authorization
Users have to be logged in with their borrower id before they can use the metadata edit functions. The borrower record should have the authorization level set in the appropriate optional field. There are 3 levels of authorization (values 1, 2 and 3):
- The user can enter new records and edit records that were originally created by him or herself – data are stored in a temporary global
- The user can enter new records and edit existing records – data are stored in a temporary global
- Like 2, but this user can validate (or delete) records entered or edited by others, and load them into the bibliographical database
There are two ways to access the metadata edit functions:
- Through a special button in the WebOpac start menu for the creation of new records.
- After retrieval of an existing record via the WebOpac search, depending upon authorization settings and ownership:
- If the user has staff user or moderator authorization
- If the user has metadata edit authorization and is the creator of the record
In either case there is a button for editing in the menu available.
3. Functionality
The selected data entry template will be used to create the data entry form. In the case of update of an existing record, the existing data will be loaded into the corresponding fields. Default values, when available in the format, will be generated for all fields.
Multiple templates can be available for selection by the user.
It is possible to hide fields from the template. In that case they are stored with their default value, or with a value that can be assigned in a conversion profile upon storage into the database after validation.
When the data have been entered the user can save the record. The record will then be stored in a temporary global. Until the record has been validated, the record can be retrieved from this global for modification or deletion (a dropdown list with records owned by the user is displayed on top of the data entry screen).
The moderator (authorization level 3) has a dropdown list on top of the data entry screen with all non-validated records, grouped by borrower. The moderator can select a record from the list, make modifications if necessary, and then save it to the bibliographical database with a previously selected import profile. The loaded record will get a special status.
The moderator can also choose to delete the record instead of validating it.
4. Setup
There are several places where setup is required in order to be able to use this functionality.
Vubis application
- AFO482 - Borrower Definition settings - Select one of the Optional fields in the Local Fields group, and set Data type to "Combo". Activate this data element and change the label to reflect its usage (there are 20 optional fields to select from. Any of the 20 may be used).
- For the authority list associated with this field, add new values of 1, 2 and 3; Meaning:
- 1 = user may enter records and edit his/her own records
- 2 = user may enter records and edit records (staff user)
- 3 = as 2, but user may also validate/delete records from other users
- Add these to the Data to be entered and Data to be corrected.
- Template(s) for the data entry and update – do not repeat fields in the template, repeatable fields are handled automatically and field occurrences are added as required. The metadata edit uses templates that are created in the standard way through AFO 153, similar to templates that are used in AFO 111.
- Import profile for the load of the records into the database – make sure that the merge profile preserves the fields that are not part of the template. The metadata edit uses standard import/load logic for addition of records to the database and therefore needs a standard profile from AFO 133.
Notes
The following properties of the AFO 133 profile are important to consider:
· 1) Profile should be of ISO2709 format
· 2) Conversion profiles optional
· 3) Database to be loaded to and template must be of the same format
· 4) Specify a specific Vubis Userid for the savelists to track records loaded. Use AFO141 to view / maintain the savelist / reporting
WebOpac preferences setup
In the Preferences page Menus, select the record editor button for the Start screen and the Full display menus if you want to use the metadata edit option for this profile.
Special preferences setup
Setup in the special preferences section related to this functionality. The following parameters exist:
· Selection of templates that can be used for data entry
· Selection of status that will be assigned to saved records
· Optional field used for metadata edit authorization setting
· Labels for the fields of the selected templates and general texts
· Flag for use of a long field
· Flag for mandatory fields (note: this does not necessarily mean that these fields are mandatory in the format)
· Flag for hidden fields (not displayed on the data entry form)
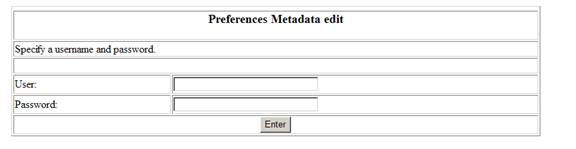
5. Logging in
To access the MetaData Preferences Setup pages, use the following url:
http://server name or number/webopac/MetaDataEditPrefs.csp
Once this address is selected, the user will be taken to the logon screen for the setting up of preferences of the MetaData Editing functionality.
Once you have logged in, you will see the Start Screen for the MetaData Preferences Setup.

4. Main screen
Options on the main screen
: This option allows you to change the password to access the MetaData Preferences screens. After choosing this option, the following screen will be displayed:

Note
You should change the default login and password so that unauthorised people cannot enter the Preference pages. A message is displayed until you do change the login and password.
: use this option to select the required language for the preferences tool.
All the options on the left hand side of the main screen are discussed in separate help documents for each section.